Data Automation - Fact Cards
Overview
In this exercise, we will use data automation tools to output several unique graphics.
This exercise will use 2 Actions to help prepare graphics for our template. The actions will resize the image and then activate the crop tool, which will allow us to get a size that matches the provided template.
Project Assets
Download the file below to practice.
Exercise 1
For Exercise 1, you will practice running the actions with image processor and the action. I have included the finished files for reference , but you should remove them from the folders so that you get practice in creating and organizing them.
File Structure
After unzipping the files, you will see the following file structure. Everything is arranged into folders.
01_Start subfolder
In the 01_Start folder, you have your starting assets. This includes an action to crop and resize the album covers and artist pictures. Additionally, the main design files are Top_Album_Template.psd and Top10-template.psd.
02_Processing subfolder
This is where you will save your files, which will be used in the final design. I already have finished ones here for your reference. However, you can move them to a different directory and try on your own.
You will also notice two CSV (comma separated value) files. This contains the data that will be used in Photoshop to replace information in the template.
Everything is setup for you.
You can open these files up in Excel or even Google Sheets to take a peek or edit. Numbers on a Mac will also work.
03_Final
This subfolder will be the location where you will export the final designs. These are the. files that you will turn in for your assignment.

1. Load Actions
To get started, open your Actions panel in Photoshop. You can find this under the Windows menu (like any other panel).

Next, go to the right-hand menu and look for the "load actions" option.
Load in your Album Covers.atn file.
2. Image Processor
Next, we are going to use the actions to crop and resize images to fit our template.
First, open up the Image Processor script.

These are the settings you will use. For the practice exercise, locate your images in the 01_Start folder and the Original_Album_Covers subfolder. These are the images for which we want to run an action on.
The second step is deciding where we are going to put the files after running the action. I have already set up a folder called Cropped_TopAlbums_2024. This is where they should go. This also matches the path location in the CSV file (which is very important).
For part 3, just check Save as JPG. That's all that you need to do there.
For part 4, you should check the "Run Action" checkbox (which is optional). From the first dropdown menu, choose Album Covers. This is what you loaded into your Actions panel. For the dropdown box next to it, choose 16x9 crop.

3. Run The Action
In the top-right hand corner of the Image Processor dialog, press the Run button to get started.
It will run through all of your image. For the first set, just move the image around and frame it however looks best. Then press on the check mark or hit Enter/Return on your keyboard.

Exercise 2
Hopefully you can see how Actions in combination with Image Processor can save you a lot of time. This workflow is great for repetitive tasks.
For Exercise 2, you will practice Defining Variables for the Top_Album_Template. The variables will match the Top_Albums_2024.csv file.
You will go through the process of defining TextReplacement and PixelReplacement variables. Then you will Import the CSV file to create the data sets.
1. Define Your Variables
First, we will have to start defining our variables. Locate this under the Image menu.
This will bring up the Variables dialog. Our task is to map the information from our spreadsheet to part of our Photoshop Template.
Photoshop has 2 main types of content we can replace, Text Layers and Pixel Layers. We can ignore visibility for now.

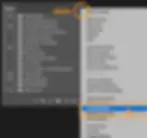
To better understand this, look at the illustration below. The layers with the (e.g., _Album Title) are going to be replaced with external data. The external data resides in the CSV file.
Notice that not all layers will be replaced with information. Some layers are decoration or layer adjustments. They help to create a consistent style.

Below, I have color coded the layers so that you can see what will be replaced with text content and what will be replaced with images (pixel replacement)

To define the variables, we have to give the variables a name. Here, it is very important that the variable names match the column headers of the CSV file.
If you click on the Layer dropdown menu in the Variables dialog, you will see a list of all of your layers. Notice how easy it is to spot what layers will need to have a variable assigned to it. You can either adopt my convention of adding an _underscore or come up with your own convention. As long as it visually stands out, that is all that matters.

Since there are 5 layers that need to be defined, you will have to go through this process 5 times.
It is very critical that the number of variables defined in Photoshop match the number of columns in your external source. If the numbers are mismatched, you will get a Parse error.
Be very certain that your variable names match the column names in your external source. If they do not, it will cause an error. I recommend just copying and pasting from the external source.

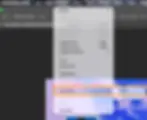
Here is a conceptual overview of what will happen when we connect to the data source. The external source (the CSV) will map on to the layers in Photoshop and then replace what is in the template.

2. Connect Your Data Source
Now that we have defined our variables, we have to connect to a data source. Go back to your dropdown menu at the top and select Data Sets.

You are now ready to import your data. Be sure that you have the Preview box checked so that you can see that your data is going through.
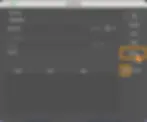
Go ahead and select your file. It is up to you if you want to use the first column for Data Set Names. If you do, whatever is in your first column will be the file name when it is exported.
By default, the encoding is set to Automatic. This works most of the time. UTF-8 will also work in most cases.

If everything went okay, you should see the first file load up. Again, be sure that you have the Preview box checked or you will not see anything. You can also ensure that everything is working by clicking on the left and right buttons next to the Data Set field.

Exercise 3
Now, we are ready to export the files. Since Photoshop knows where the data lives, I can take all of these data sets and export them as individual files.

You will place the exported files in your 03_Final folder and look for the Top_Albums_2024 subfolder. This is where your files will go.
Also, for the name option, just use the Data Set Name.

At this point, you have successfully completed the lesson. You will now see your 10 files output into your folder.

Locked Message